
Want to insulate your car's floor panel? Discover which materials you need, how to dampen the floor and how to reduce road and exhaust noise.
Do you want less road noise, tyre noise and exhaust noise in your car? Then insulating the floor pan is one of the most effective places to start. The floor pan lies directly between the road surface, the chassis and the cabin. As a result, vibration from the tyres, exhaust, suspension and sheet metal can easily be passed on to the interior.
By fitting the inside of the car's floor pan with the right insulation materials, you reduce the sounding-board effect of the metal. Especially in cars with little factory insulation, vans, campers, classic cars and vehicles with an open or large cabin, this can noticeably contribute to more driving comfort.
The basis usually consists of a self-adhesive vibration insulation or damping mat on the bare sheet metal. On top of that, depending on the space under the trim, you can fit a sound insulating floor mat or finishing layer for extra damping and comfort.
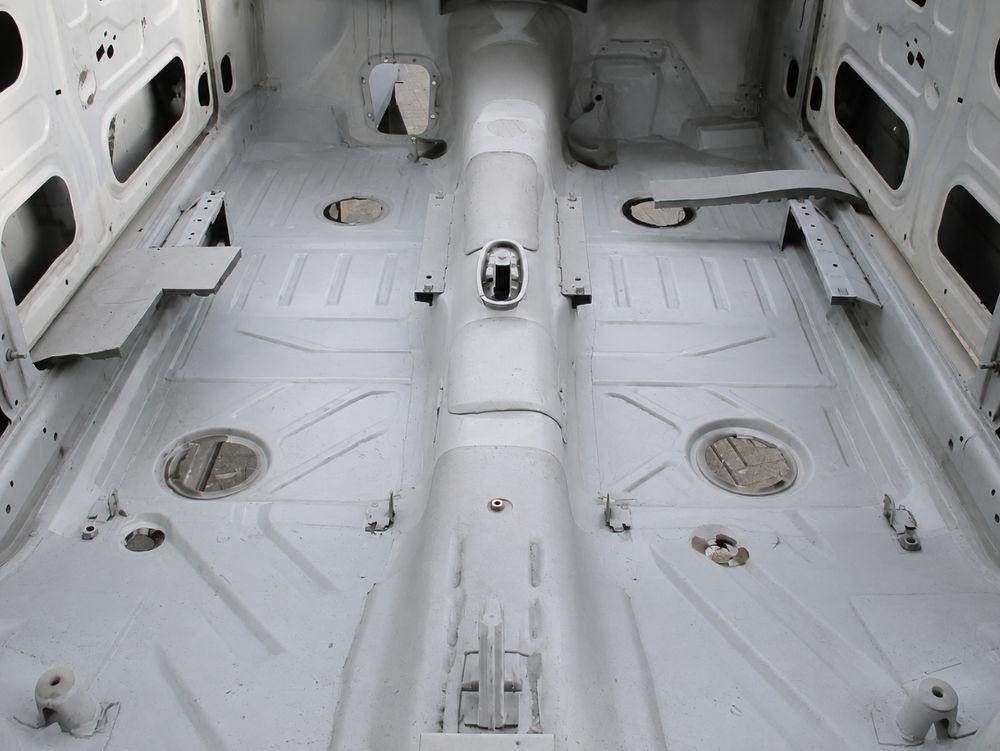
Floor pan insulation is especially worthwhile when you hear a lot of noise coming from the floor while driving. Think of tyre roar on coarse asphalt, humming noise at higher speeds or impact noise from the chassis. Even if the floor covering is thin or the car has little original insulation, extra damping can make a big difference.
To insulate the floor pan, you usually work with a layered build-up. Each layer has its own function. You achieve the best result by not just laying a soft mat on the floor, but first damping the metal sheet itself.
You apply the first layer directly to the bare, clean sheet metal. A self-adhesive damping mat adds mass and slows down vibration in the metal. This makes the floor pan less likely to resonate and reduces the sounding-board effect.
For extra comfort, you can place a sound insulating floor mat on top of the damping layer. This layer helps with further damping, provides a neat finish and can be used under the original floor covering if there is enough room.
After fitting the insulation, you put back the original floor covering, carpet set or car mats. Always check that seat rails, seat belt anchor points, pedals, cable grommets and fixing points remain free and continue to function safely. If you like, you can add extra needle felt with a granulate backing for a luxurious finish
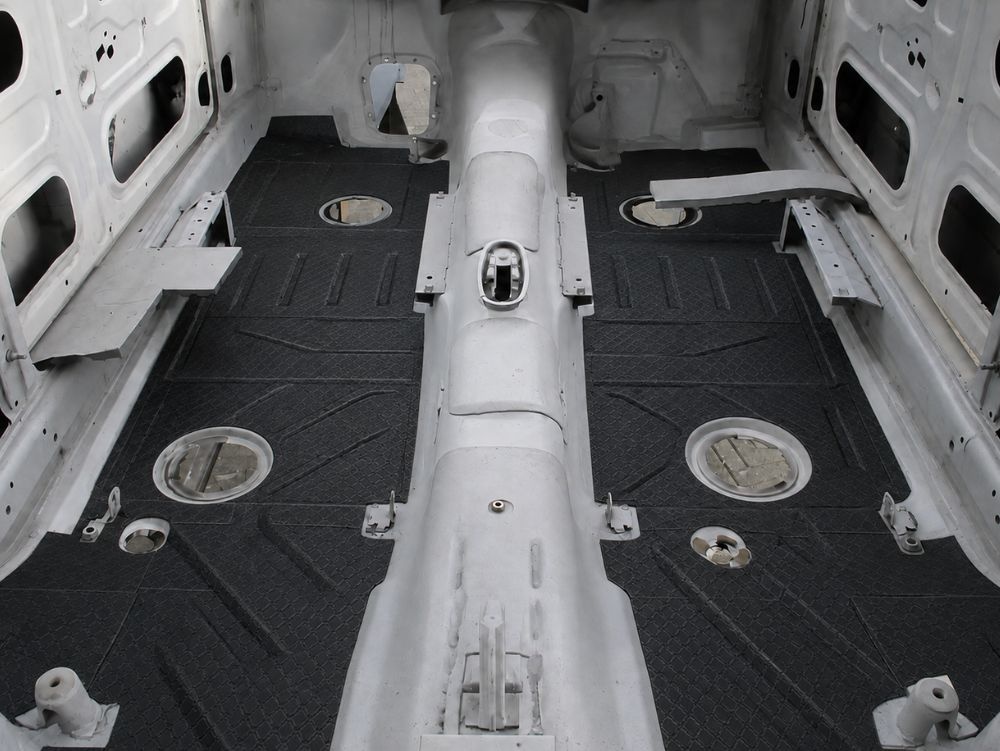
For the floor pan, the general rule is: the more metal surface you treat, the better the basic damping. The floor is a large continuous part that transmits a lot of impact noise. That is why it is wise not to stick on just a few separate pieces, but to cover as much accessible sheet metal as possible.
Focus mainly on the floor under the front seats, the footwells, the centre tunnel, the floor under the rear seat and the transition towards the boot. You do not need to stick anything onto plastic panels. Most of the gain is in metal parts that vibrate directly or transmit sound.
Good preparation determines the end result to a large extent. The most common mistake is applying insulation material to dirty, damp or greasy sheet metal. As a result, the mat can come loose or damp less effectively.
The floor pan is connected to several parts of the car. Sound does not stop at one panel. That is why floor pan insulation often works best as part of a broader approach to car sound insulation.
Do you mainly want less noise from the rear of the car? Then combine the floor pan with the boot, spare wheel well and wheel arches. If you want less engine noise or noise coming through the front, then the bulkhead is a logical additional part to look at.
For a complete approach, you can think of this order:
Which materials you need depends on the car, the space available under the trim and the noise you want to reduce. For most floor pans, you start with a self-adhesive damping mat on the sheet metal. After that you can choose an additional sound insulating floor mat as a second layer.
At Geluidsisolatie Deal you will find insulation materials for vehicles, such as self-adhesive damping mats, vibration insulation and sound insulating finishing layers. These materials are suitable for metal parts such as the floor pan, wheel arches, boot, spare wheel well and other vehicle panels.
Not sure how much material you need or which combination suits your vehicle? Get in touch with us. We will gladly help you work it out based on the type of car, the shape of the floor, the available installation space and the type of noise you want to reduce.
The floor pan lies directly between the road surface and the cabin. Vibration from tyres, chassis and exhaust can be passed on to the interior via the thin sheet metal. That makes the floor pan an important source of road noise and resonance.
Yes, this is quite doable yourself if you work carefully and prepare the sheet metal well. Do bear in mind that you may have to remove floor covering, sill panels or seats. Always watch out for cables, connectors and safety systems.
For the best result, cover as much accessible sheet metal as possible. Focus mainly on the footwells, floor under the seats, centre tunnel and transition to the rear seat or boot. Keep fixing points, cable grommets and drainage points free.
You usually start with a self-adhesive damping mat or vibration damping mat on the bare sheet metal. For extra comfort and finish, you can place a sound insulating floor mat on top, if there is enough room for this under the original trim.
Floor pan insulation can reduce exhaust noise in the cabin when that noise is passed on via the floor, centre tunnel or underside of the vehicle. The result depends on the car, the exhaust, the existing insulation and how much sheet metal is treated.
A damping mat is the most important first layer, because it makes the sheet metal resonate less. A sound insulating floor mat can offer extra comfort, mass and finish on top of that. The best choice depends on the available space and the result you want.
That is often sensible. Sound travels easily via adjoining metal parts. For a more complete result, preferably combine the floor pan with the wheel arches, boot, spare wheel well and possibly the bulkhead.
Find the order you'd like to withdraw
Enter your email address and order number.
Check your mailbox
If your details match an order, you'll receive an email with a link to view and manage it.